Traditional keyword search breaks the moment a user types something slightly different from what is stored in your database. A user searches for "affordable laptop" but your products are tagged "budget notebook" — zero results. A user searches "fix login bug" but your blog post is titled "Resolve Authentication Issue" — not found.
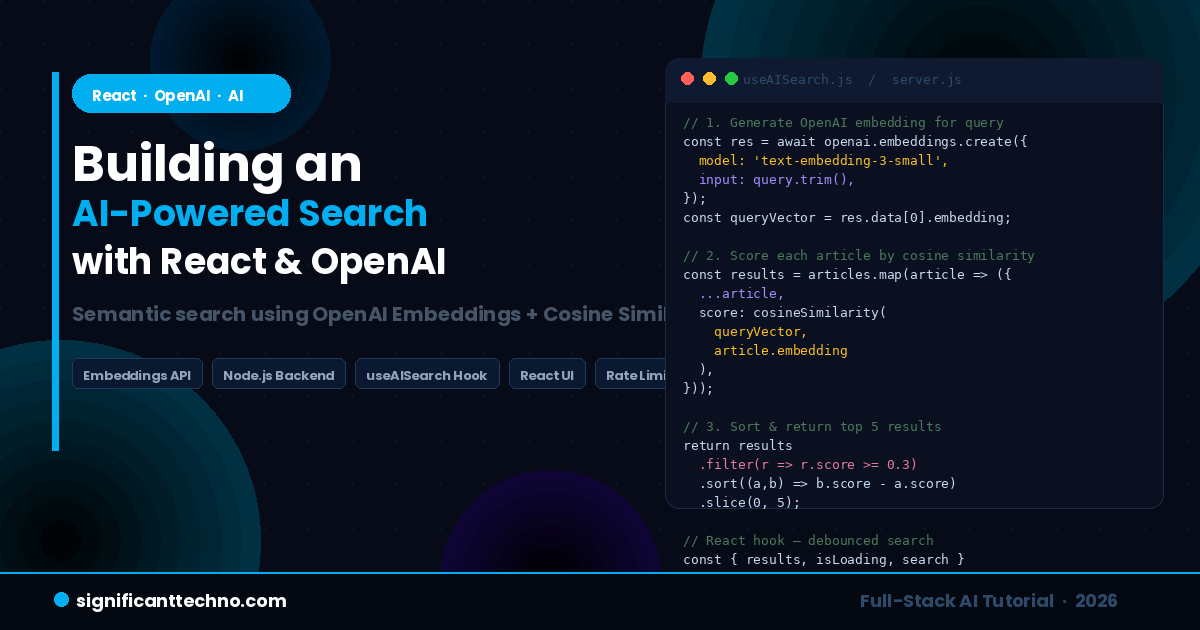
AI-powered semantic search solves this completely. Instead of matching exact words, it understands the meaning behind a query and returns results that are conceptually similar — even when the words do not match at all. In this tutorial, you will build a fully working AI-powered search feature from scratch using React on the frontend, Node.js on the backend, and the OpenAI Embeddings API.
By the end of this guide you will have a complete, production-ready AI search component that you can drop into any React application.
Table of Contents
- How AI-Powered Search Works
- What are OpenAI Embeddings?
- Project Structure
- Step 1 — Backend Setup with Node.js and Express
- Step 2 — Generate and Store Embeddings
- Step 3 — Build the Search API Endpoint
- Step 4 — Cosine Similarity Function
- Step 5 — React Frontend Setup
- Step 6 — Custom useAISearch Hook
- Step 7 — Build the Search UI Component
- Step 8 — Search Results Component
- Step 9 — Connect Everything in App.jsx
- Step 10 — Styling the Search Component
- Step 11 — How to Run the Project
- Best Practices & Production Tips
- Conclusion
1. How AI-Powered Search Works
Understanding the concept before writing code will make everything much clearer. Here is what happens when a user types a search query in an AI-powered search system:
- The user types a search query, for example: "affordable web hosting"
- The query is sent to the OpenAI Embeddings API, which converts it into a vector — a list of numbers (e.g. 1536 numbers) that represent the meaning of the query in mathematical space
- Each item in your search database already has its own vector (pre-generated when you added the data)
- Your backend calculates the cosine similarity between the query vector and every item vector — this gives a score between 0 and 1 indicating how similar the meaning is
- Items are ranked by similarity score and the top results are returned to React
- React displays the results — even if none of them contain the exact words "affordable web hosting"
This approach is called semantic search or vector search. It is what powers search in Google, Notion, GitHub Copilot, and most modern AI applications. The OpenAI text-embedding-3-small model is the most cost-effective way to implement this in 2026, costing approximately $0.02 per million tokens.
2. What are OpenAI Embeddings?
An embedding is a numerical representation of text as a vector (an array of floating point numbers). Texts with similar meaning produce vectors that are mathematically close to each other in vector space. Texts with different meanings produce vectors that are far apart.
For example, when you convert these three sentences to embeddings:
- "affordable laptop" → [0.023, -0.145, 0.312, ...]
- "budget notebook computer" → [0.019, -0.138, 0.298, ...]
- "how to bake a cake" → [-0.412, 0.223, -0.091, ...]
The first two vectors are very close to each other (similar meaning). The third is very far from both (completely different topic). Cosine similarity is the formula used to measure how close two vectors are — a score of 1.0 means identical meaning, 0.0 means completely unrelated.
OpenAI's text-embedding-3-small model produces vectors with 1536 dimensions and is the recommended model for production search applications in 2026.
3. Project Structure
We will build a full-stack project with a Node.js/Express backend and a React frontend. Here is the complete folder structure you will create during this tutorial:
ai-search-project/
│
├── backend/                        ← Node.js + Express API server
│   ├── package.json
│   ├── .env                        ← API keys (never commit this)
│   ├── server.js                   ← Express server entry point
│   ├── generateEmbeddings.js       ← Script to pre-generate embeddings
│   ├── data/
│   │   ├── articles.js             ← Your searchable data
│   │   └── embeddings.json         ← Pre-generated embeddings (auto-created)
│   └── utils/
│       └── cosineSimilarity.js     ← Cosine similarity calculation
│
└── frontend/                       ← React application
    ├── package.json
    ├── .env                        ← Frontend env vars
    └── src/
        ├── App.jsx                 ← Root component
        ├── App.css                 ← Global styles
        ├── hooks/
        │   └── useAISearch.js      ← Custom AI search hook
        └── components/
            ├── SearchBar.jsx       ← Search input component
            └── SearchResults.jsx   ← Results display component
4. Step 1 — Backend Setup with Node.js and Express
First, create the project folders and install all required dependencies.
Run these commands in your terminal:
mkdir ai-search-project
cd ai-search-project
mkdir backend frontend
cd backend
npm init -y
npm install express openai cors dotenv
? Create a new file called .env inside the backend/ folder and add your OpenAI API key:
OPENAI_API_KEY=your_openai_api_key_here
PORT=5000
? Create a new file called data/articles.js inside the backend/ folder. This is the searchable data — in a real app this would come from your database:
// backend/data/articles.js
// This is your searchable dataset — replace with your actual database data

const articles = [
  {
    id: 1,
    title: "Getting Started with Laravel 11",
    description: "A beginner's guide to installing and setting up Laravel 11 with Composer on Windows, Mac, and Linux.",
    category: "Laravel",
    url: "/blog/getting-started-with-laravel-11",
  },
  {
    id: 2,
    title: "How to Use Eloquent ORM in Laravel",
    description: "Learn how to interact with your MySQL database using Laravel's Eloquent ORM including relationships, scopes, and accessors.",
    category: "Laravel",
    url: "/blog/eloquent-orm-laravel",
  },
  {
    id: 3,
    title: "React Hooks Tutorial for Beginners",
    description: "Understand useState, useEffect, useRef, and custom hooks with practical examples in React 18.",
    category: "React",
    url: "/blog/react-hooks-tutorial",
  },
  {
    id: 4,
    title: "Build a REST API with Node.js and Express",
    description: "Step-by-step tutorial to create a RESTful API using Node.js, Express, and MongoDB with JWT authentication.",
    category: "Node.js",
    url: "/blog/rest-api-nodejs-express",
  },
  {
    id: 5,
    title: "MySQL Query Optimization Tips",
    description: "Improve your MySQL query performance using indexes, EXPLAIN, query caching, and avoiding common mistakes.",
    category: "MySQL",
    url: "/blog/mysql-query-optimization",
  },
  {
    id: 6,
    title: "CSS Flexbox vs Grid: Complete Guide",
    description: "Understand when to use Flexbox vs CSS Grid with practical layout examples and browser compatibility notes.",
    category: "CSS",
    url: "/blog/css-flexbox-vs-grid",
  },
  {
    id: 7,
    title: "PHP Security Best Practices",
    description: "Protect your PHP applications from SQL injection, XSS, CSRF, file upload vulnerabilities, and session hijacking.",
    category: "PHP",
    url: "/blog/php-security-best-practices",
  },
  {
    id: 8,
    title: "ChatGPT API Integration in PHP",
    description: "Learn how to connect your PHP application to the OpenAI ChatGPT API to generate text, summaries, and answers.",
    category: "AI",
    url: "/blog/chatgpt-api-integration-php",
  },
  {
    id: 9,
    title: "JavaScript Async Await Tutorial",
    description: "Master asynchronous JavaScript with Promises, async/await, error handling, and parallel execution patterns.",
    category: "JavaScript",
    url: "/blog/javascript-async-await",
  },
  {
    id: 10,
    title: "Deploy Laravel App on Shared Hosting",
    description: "Complete guide to deploying your Laravel application on shared hosting including cPanel configuration and SSL setup.",
    category: "Laravel",
    url: "/blog/deploy-laravel-shared-hosting",
  },
];

module.exports = articles;
5. Step 2 — Generate and Store Embeddings
Before the search can work, you need to convert all your articles into embedding vectors and save them. This is a one-time process — you only need to re-run it when you add new data.
? Create a new file called generateEmbeddings.js inside the backend/ folder:
// backend/generateEmbeddings.js
// Run this script once to generate embeddings for all your articles
// Command: node generateEmbeddings.js

require('dotenv').config();
const OpenAI = require('openai');
const fs = require('fs');
const path = require('path');
const articles = require('./data/articles');

const openai = new OpenAI({
  apiKey: process.env.OPENAI_API_KEY,
});

async function generateEmbeddings() {
  console.log(`Generating embeddings for ${articles.length} articles...`);

  const embeddingsData = [];

  for (const article of articles) {
    // Combine title + description for richer embedding context
    const textToEmbed = `${article.title}. ${article.description}`;

    try {
      const response = await openai.embeddings.create({
        model: 'text-embedding-3-small', // Cost-effective model: $0.02 per 1M tokens
        input: textToEmbed,
      });

      embeddingsData.push({
        id: article.id,
        title: article.title,
        description: article.description,
        category: article.category,
        url: article.url,
        embedding: response.data[0].embedding, // Array of 1536 numbers
      });

      console.log(`✅ Generated embedding for: "${article.title}"`);

    } catch (error) {
      console.error(`❌ Failed for article ID ${article.id}:`, error.message);
    }
  }

  // Save all embeddings to a JSON file
  const outputPath = path.join(__dirname, 'data', 'embeddings.json');
  fs.writeFileSync(outputPath, JSON.stringify(embeddingsData, null, 2));

  console.log(`\n✅ All embeddings saved to: ${outputPath}`);
  console.log(`Total articles processed: ${embeddingsData.length}`);
}

generateEmbeddings();
Run the script to generate embeddings:
node generateEmbeddings.jsThis will create a file at backend/data/embeddings.json containing all your articles with their pre-computed embedding vectors. This file is what the search endpoint will use at query time.
6. Step 3 — Build the Search API Endpoint
? Create the main Express server file at backend/server.js:
// backend/server.js
// Express API server with AI-powered search endpoint

require('dotenv').config();
const express = require('express');
const cors = require('cors');
const OpenAI = require('openai');
const fs = require('fs');
const path = require('path');
const cosineSimilarity = require('./utils/cosineSimilarity');

const app = express();
const PORT = process.env.PORT || 5000;

// Initialize OpenAI client
const openai = new OpenAI({
  apiKey: process.env.OPENAI_API_KEY,
});

// Middleware
app.use(cors());
app.use(express.json());

// Load pre-generated embeddings into memory on server start
// This avoids reading from disk on every search request
let embeddingsData = [];
const embeddingsPath = path.join(__dirname, 'data', 'embeddings.json');

if (fs.existsSync(embeddingsPath)) {
  embeddingsData = JSON.parse(fs.readFileSync(embeddingsPath, 'utf-8'));
  console.log(`✅ Loaded ${embeddingsData.length} article embeddings into memory`);
} else {
  console.warn('⚠️  No embeddings.json found. Run: node generateEmbeddings.js first');
}

// -------------------------------------------------------
// GET /api/health — Health check endpoint
// -------------------------------------------------------
app.get('/api/health', (req, res) => {
  res.json({
    status: 'ok',
    embeddingsLoaded: embeddingsData.length,
  });
});

// -------------------------------------------------------
// POST /api/search — AI-powered semantic search endpoint
// -------------------------------------------------------
app.post('/api/search', async (req, res) => {
  const { query } = req.body;

  // Validate request
  if (!query || typeof query !== 'string' || query.trim().length === 0) {
    return res.status(400).json({ error: 'Query is required and must be a non-empty string.' });
  }

  if (query.trim().length < 2) {
    return res.status(400).json({ error: 'Query must be at least 2 characters long.' });
  }

  try {
    // Step 1: Convert the user's query to an embedding vector
    const queryEmbeddingResponse = await openai.embeddings.create({
      model: 'text-embedding-3-small',
      input: query.trim(),
    });

    const queryVector = queryEmbeddingResponse.data[0].embedding;

    // Step 2: Calculate cosine similarity between query and every article
    const results = embeddingsData.map((article) => ({
      id: article.id,
      title: article.title,
      description: article.description,
      category: article.category,
      url: article.url,
      score: cosineSimilarity(queryVector, article.embedding),
    }));

    // Step 3: Sort by similarity score (highest first) and filter low scores
    const MINIMUM_SCORE = 0.3; // Threshold — adjust based on your data
    const TOP_RESULTS = 5;     // Maximum number of results to return

    const topResults = results
      .filter((r) => r.score >= MINIMUM_SCORE)
      .sort((a, b) => b.score - a.score)
      .slice(0, TOP_RESULTS)
      .map((r) => ({
        ...r,
        score: Math.round(r.score * 100), // Convert to percentage for display
      }));

    return res.json({
      query: query.trim(),
      results: topResults,
      total: topResults.length,
    });

  } catch (error) {
    console.error('Search error:', error.message);
    return res.status(500).json({ error: 'Search failed. Please try again.' });
  }
});

// Start server
app.listen(PORT, () => {
  console.log(`? AI Search API running at http://localhost:${PORT}`);
});
7. Step 4 — Cosine Similarity Function
Cosine similarity is the mathematical formula used to measure how similar two vectors are. A score of 1.0 means the vectors are identical (perfect match). A score of 0.0 means they are completely unrelated.
? Create a new file at backend/utils/cosineSimilarity.js:
// backend/utils/cosineSimilarity.js
// Calculates the cosine similarity between two vectors (arrays of numbers)
// Returns a value between 0 (unrelated) and 1 (identical meaning)

function cosineSimilarity(vectorA, vectorB) {
  if (!vectorA || !vectorB || vectorA.length !== vectorB.length) {
    throw new Error('Both vectors must exist and have the same length.');
  }

  let dotProduct = 0;     // Sum of A[i] * B[i]
  let magnitudeA = 0;     // Square root of sum of A[i]^2
  let magnitudeB = 0;     // Square root of sum of B[i]^2

  for (let i = 0; i < vectorA.length; i++) {
    dotProduct += vectorA[i] * vectorB[i];
    magnitudeA += vectorA[i] * vectorA[i];
    magnitudeB += vectorB[i] * vectorB[i];
  }

  magnitudeA = Math.sqrt(magnitudeA);
  magnitudeB = Math.sqrt(magnitudeB);

  // Prevent division by zero
  if (magnitudeA === 0 || magnitudeB === 0) return 0;

  return dotProduct / (magnitudeA * magnitudeB);
}

module.exports = cosineSimilarity;
This is the core algorithm that makes semantic search work. For OpenAI embeddings (which are already normalized), this calculation is extremely fast — even for thousands of articles.
8. Step 5 — React Frontend Setup
Now let us set up the React frontend. Open a new terminal tab and run these commands:
cd ../frontend
npm create vite@latest . -- --template react
npm install
npm install axios
? Create a .env file inside the frontend/ folder to store the backend API URL:
VITE_API_URL=http://localhost:5000/api9. Step 6 — Custom useAISearch Hook
A custom hook keeps all the search logic clean and reusable. It handles the API call, loading state, error state, and debouncing so the API is not called on every single keystroke.
? Create a new file at frontend/src/hooks/useAISearch.js:
// frontend/src/hooks/useAISearch.js
// Custom hook for AI-powered semantic search
// Handles debouncing, API calls, loading state, and error handling

import { useState, useCallback, useRef } from 'react';
import axios from 'axios';

const API_URL = import.meta.env.VITE_API_URL || 'http://localhost:5000/api';
const DEBOUNCE_DELAY = 500; // Wait 500ms after user stops typing before searching

export function useAISearch() {
  const [results, setResults] = useState([]);
  const [isLoading, setIsLoading] = useState(false);
  const [error, setError] = useState(null);
  const [lastQuery, setLastQuery] = useState('');
  const debounceTimer = useRef(null);

  // Main search function — called from the SearchBar component
  const search = useCallback((query) => {
    // Clear previous debounce timer
    if (debounceTimer.current) {
      clearTimeout(debounceTimer.current);
    }

    // Reset state if query is too short
    if (!query || query.trim().length < 2) {
      setResults([]);
      setError(null);
      setLastQuery('');
      return;
    }

    // Debounce: wait until user stops typing
    debounceTimer.current = setTimeout(async () => {
      setIsLoading(true);
      setError(null);

      try {
        const response = await axios.post(`${API_URL}/search`, {
          query: query.trim(),
        });

        setResults(response.data.results || []);
        setLastQuery(query.trim());

      } catch (err) {
        const message = err.response?.data?.error || 'Search failed. Please try again.';
        setError(message);
        setResults([]);
      } finally {
        setIsLoading(false);
      }
    }, DEBOUNCE_DELAY);
  }, []);

  // Clear all search state
  const clearSearch = useCallback(() => {
    if (debounceTimer.current) {
      clearTimeout(debounceTimer.current);
    }
    setResults([]);
    setError(null);
    setLastQuery('');
    setIsLoading(false);
  }, []);

  return {
    results,
    isLoading,
    error,
    lastQuery,
    search,
    clearSearch,
  };
}
10. Step 7 — Build the Search UI Component
? Create a new file at frontend/src/components/SearchBar.jsx:
// frontend/src/components/SearchBar.jsx
// AI-powered search input component with loading indicator and clear button

import { useState } from 'react';

export default function SearchBar({ onSearch, onClear, isLoading }) {
  const [query, setQuery] = useState('');

  // Handle input change — triggers the debounced search in the parent hook
  function handleChange(e) {
    const value = e.target.value;
    setQuery(value);
    onSearch(value);
  }

  // Handle clear button click
  function handleClear() {
    setQuery('');
    onClear();
  }

  return (
    <div className="search-bar-wrapper">
      <div className="search-bar-container">

        {/* Search icon */}
        <span className="search-icon">
          {isLoading ? (
            <span className="spinner" aria-label="Searching..."></span>
          ) : (
            <svg width="20" height="20" viewBox="0 0 24 24" fill="none" stroke="currentColor" strokeWidth="2">
              <circle cx="11" cy="11" r="8" />
              <line x1="21" y1="21" x2="16.65" y2="16.65" />
            </svg>
          )}
        </span>

        {/* Search input */}
        <input
          type="text"
          className="search-input"
          placeholder="Search articles... (try: database performance, fix login issue)"
          value={query}
          onChange={handleChange}
          aria-label="AI Search"
          autoComplete="off"
          spellCheck="false"
        />

        {/* AI badge */}
        <span className="ai-badge">AI</span>

        {/* Clear button — only shown when there is text */}
        {query.length > 0 && (
          <button className="clear-btn" onClick={handleClear} aria-label="Clear search">
            ×
          </button>
        )}
      </div>

      {/* Helper text */}
      <p className="search-helper">
        Powered by OpenAI Semantic Search — finds results by meaning, not just keywords
      </p>
    </div>
  );
}
11. Step 8 — Search Results Component
? Create a new file at frontend/src/components/SearchResults.jsx:
// frontend/src/components/SearchResults.jsx
// Displays AI search results with relevance score badges

export default function SearchResults({ results, isLoading, error, lastQuery }) {

  // Loading state
  if (isLoading) {
    return (
      <div className="results-container">
        {[1, 2, 3].map((i) => (
          <div key={i} className="result-skeleton">
            <div className="skeleton-line skeleton-title"></div>
            <div className="skeleton-line skeleton-desc"></div>
            <div className="skeleton-line skeleton-meta"></div>
          </div>
        ))}
      </div>
    );
  }

  // Error state
  if (error) {
    return (
      <div className="results-container">
        <div className="error-box">
          <span className="error-icon">⚠️</span>
          <p>{error}</p>
        </div>
      </div>
    );
  }

  // No results state
  if (lastQuery && results.length === 0) {
    return (
      <div className="results-container">
        <div className="no-results">
          <span className="no-results-icon">?</span>
          <p>No results found for <strong>"{lastQuery}"</strong></p>
          <p className="no-results-tip">Try different keywords or a broader description</p>
        </div>
      </div>
    );
  }

  // Results list
  if (results.length > 0) {
    return (
      <div className="results-container">
        <p className="results-meta">
          Found <strong>{results.length}</strong> results for <strong>"{lastQuery}"</strong>
        </p>
        <ul className="results-list">
          {results.map((result) => (
            <li key={result.id} className="result-card">
              <div className="result-header">
                <span className="result-category">{result.category}</span>
                <span
                  className={`result-score ${result.score >= 70 ? 'score-high' : result.score >= 50 ? 'score-medium' : 'score-low'}`}
                >
                  {result.score}% match
                </span>
              </div>
              <a href={result.url} className="result-title">
                {result.title}
              </a>
              <p className="result-description">{result.description}</p>
            </li>
          ))}
        </ul>
      </div>
    );
  }

  // Default empty state
  return null;
}
12. Step 9 — Connect Everything in App.jsx
? Replace the contents of frontend/src/App.jsx with the following:
// frontend/src/App.jsx
// Root component — connects SearchBar, SearchResults, and useAISearch hook

import { useAISearch } from './hooks/useAISearch';
import SearchBar from './components/SearchBar';
import SearchResults from './components/SearchResults';
import './App.css';

export default function App() {
  const { results, isLoading, error, lastQuery, search, clearSearch } = useAISearch();

  return (
    <div className="app">
      {/* Page Header */}
      <header className="app-header">
        <div className="header-inner">
          <a href="/" className="site-logo">
            Significant<span>Techno</span>
          </a>
        </div>
      </header>

      {/* Hero Section */}
      <main className="app-main">
        <div className="hero">
          <span className="hero-badge">⚡ Powered by OpenAI Embeddings</span>
          <h1 className="hero-title">
            AI-Powered Search
          </h1>
          <p className="hero-subtitle">
            Search by meaning — not just keywords. Try: <em>"database is slow"</em>,
            <em>"protect from hackers"</em>, or <em>"fix login problem"</em>
          </p>

          {/* Search Bar */}
          <SearchBar
            onSearch={search}
            onClear={clearSearch}
            isLoading={isLoading}
          />

          {/* Search Results */}
          <SearchResults
            results={results}
            isLoading={isLoading}
            error={error}
            lastQuery={lastQuery}
          />
        </div>
      </main>
    </div>
  );
}
13. Step 10 — Styling the Search Component
? Replace the contents of frontend/src/App.css with the following styles:
/* frontend/src/App.css — AI Search Feature Styles */

* {
  margin: 0;
  padding: 0;
  box-sizing: border-box;
}

body {
  font-family: 'Segoe UI', Tahoma, Geneva, Verdana, sans-serif;
  background-color: #0a0e1a;
  color: #e2e8f0;
  min-height: 100vh;
}

/* ---- Header ---- */
.app-header {
  background: #080c18;
  border-bottom: 1px solid #1e2d4a;
  padding: 16px 24px;
}

.header-inner {
  max-width: 860px;
  margin: auto;
}

.site-logo {
  font-size: 20px;
  font-weight: 700;
  color: #ffffff;
  text-decoration: none;
}

.site-logo span {
  color: #01AEEF;
}

/* ---- Hero ---- */
.app-main {
  display: flex;
  justify-content: center;
  padding: 60px 20px;
}

.hero {
  width: 100%;
  max-width: 860px;
  text-align: center;
}

.hero-badge {
  display: inline-block;
  background: #0a1f3a;
  color: #01AEEF;
  border: 1px solid #01AEEF;
  border-radius: 20px;
  padding: 6px 18px;
  font-size: 13px;
  font-weight: 600;
  margin-bottom: 20px;
}

.hero-title {
  font-size: 48px;
  font-weight: 800;
  color: #ffffff;
  margin-bottom: 16px;
  line-height: 1.2;
}

.hero-subtitle {
  font-size: 16px;
  color: #64748b;
  margin-bottom: 40px;
  line-height: 1.7;
}

.hero-subtitle em {
  color: #01AEEF;
  font-style: normal;
  font-weight: 600;
}

/* ---- Search Bar ---- */
.search-bar-wrapper {
  margin-bottom: 32px;
}

.search-bar-container {
  display: flex;
  align-items: center;
  background: #0f1a2e;
  border: 2px solid #1e3050;
  border-radius: 14px;
  padding: 14px 18px;
  gap: 12px;
  transition: border-color 0.2s;
}

.search-bar-container:focus-within {
  border-color: #01AEEF;
  box-shadow: 0 0 0 4px rgba(1, 174, 239, 0.1);
}

.search-icon {
  color: #64748b;
  display: flex;
  align-items: center;
  flex-shrink: 0;
}

.search-input {
  flex: 1;
  background: transparent;
  border: none;
  outline: none;
  font-size: 16px;
  color: #e2e8f0;
}

.search-input::placeholder {
  color: #334155;
}

.ai-badge {
  background: #01AEEF;
  color: #fff;
  font-size: 11px;
  font-weight: 700;
  padding: 3px 9px;
  border-radius: 5px;
  flex-shrink: 0;
  letter-spacing: 0.05em;
}

.clear-btn {
  background: #1e3050;
  border: none;
  color: #94a3b8;
  font-size: 18px;
  cursor: pointer;
  width: 28px;
  height: 28px;
  border-radius: 50%;
  display: flex;
  align-items: center;
  justify-content: center;
  flex-shrink: 0;
  transition: background 0.15s;
}

.clear-btn:hover {
  background: #2d4a70;
  color: #fff;
}

.search-helper {
  font-size: 12px;
  color: #334155;
  margin-top: 10px;
}

/* ---- Spinner ---- */
.spinner {
  display: inline-block;
  width: 18px;
  height: 18px;
  border: 2px solid #1e3050;
  border-top-color: #01AEEF;
  border-radius: 50%;
  animation: spin 0.7s linear infinite;
}

@keyframes spin {
  to { transform: rotate(360deg); }
}

/* ---- Results ---- */
.results-container {
  text-align: left;
}

.results-meta {
  font-size: 14px;
  color: #64748b;
  margin-bottom: 16px;
}

.results-meta strong {
  color: #e2e8f0;
}

.results-list {
  list-style: none;
  display: flex;
  flex-direction: column;
  gap: 12px;
}

.result-card {
  background: #0f1a2e;
  border: 1px solid #1e3050;
  border-radius: 12px;
  padding: 18px 22px;
  transition: border-color 0.2s, transform 0.15s;
}

.result-card:hover {
  border-color: #01AEEF;
  transform: translateY(-2px);
}

.result-header {
  display: flex;
  align-items: center;
  justify-content: space-between;
  margin-bottom: 8px;
}

.result-category {
  font-size: 11px;
  font-weight: 700;
  color: #01AEEF;
  background: #0a1f3a;
  border: 1px solid #01AEEF;
  padding: 3px 10px;
  border-radius: 4px;
  text-transform: uppercase;
  letter-spacing: 0.06em;
}

.result-score {
  font-size: 12px;
  font-weight: 700;
  padding: 3px 10px;
  border-radius: 4px;
}

.score-high  { background: #052e16; color: #4ade80; }
.score-medium { background: #1c1917; color: #fbbf24; }
.score-low   { background: #1c0a0a; color: #f87171; }

.result-title {
  display: block;
  font-size: 17px;
  font-weight: 700;
  color: #ffffff;
  text-decoration: none;
  margin-bottom: 8px;
  line-height: 1.4;
}

.result-title:hover {
  color: #01AEEF;
}

.result-description {
  font-size: 14px;
  color: #64748b;
  line-height: 1.6;
}

/* ---- Skeleton Loader ---- */
.result-skeleton {
  background: #0f1a2e;
  border: 1px solid #1e3050;
  border-radius: 12px;
  padding: 18px 22px;
}

.skeleton-line {
  background: #1e3050;
  border-radius: 4px;
  margin-bottom: 10px;
  animation: pulse 1.4s ease-in-out infinite;
}

.skeleton-title { height: 20px; width: 65%; }
.skeleton-desc  { height: 14px; width: 100%; }
.skeleton-meta  { height: 12px; width: 40%; }

@keyframes pulse {
  0%, 100% { opacity: 1; }
  50% { opacity: 0.4; }
}

/* ---- Error & Empty States ---- */
.error-box {
  background: #1c0a0a;
  border: 1px solid #7f1d1d;
  border-radius: 10px;
  padding: 18px;
  display: flex;
  align-items: center;
  gap: 12px;
  color: #f87171;
}

.no-results {
  text-align: center;
  padding: 40px 20px;
  color: #64748b;
}

.no-results-icon {
  font-size: 36px;
  display: block;
  margin-bottom: 12px;
}

.no-results strong {
  color: #e2e8f0;
}

.no-results-tip {
  font-size: 13px;
  margin-top: 8px;
  color: #334155;
}
14. Step 11 — How to Run the Project
Terminal 1 — Start the backend server:
cd backend
node generateEmbeddings.js    # Run only once to generate embeddings
node server.js                # Start the API server
You should see this output:
✅ Loaded 10 article embeddings into memory
? AI Search API running at http://localhost:5000
Terminal 2 — Start the React frontend:
cd frontend
npm run dev
Open your browser at http://localhost:5173 and try these search queries to see the semantic search in action:
- "database is slow" → returns MySQL Query Optimization
- "protect from hackers" → returns PHP Security Best Practices
- "fix login problem" → returns REST API with JWT Authentication
- "affordable hosting" → returns Deploy Laravel on Shared Hosting
- "AI text generation" → returns ChatGPT API Integration in PHP
Notice how none of these queries use the exact words from the article titles — but the semantic search finds the right results every time.
15. Best Practices & Production Tips
Never expose your OpenAI API key on the frontend. Always call the OpenAI API from your backend server. The frontend only talks to your own backend API. Your .env file should never be committed to Git — add it to .gitignore immediately.
# Add this to your .gitignore file
.env
backend/data/embeddings.json
Add rate limiting to prevent API abuse. Install and use the express-rate-limit package on your search endpoint:
// backend/server.js — add rate limiting

const rateLimit = require('express-rate-limit');

const searchLimiter = rateLimit({
  windowMs: 60 * 1000,   // 1 minute window
  max: 30,               // max 30 search requests per minute per IP
  message: { error: 'Too many requests. Please wait a moment and try again.' },
});

// Apply rate limiter to search route only
app.post('/api/search', searchLimiter, async (req, res) => {
  // ... search logic
});
Store embeddings in a database for large datasets. For more than a few hundred articles, storing embeddings in embeddings.json becomes inefficient. Use PostgreSQL with the pgvector extension or a dedicated vector database like Pinecone or Qdrant for production-scale search.
Cache frequent search queries. If the same query is searched repeatedly, cache the result for a few minutes to save OpenAI API costs:
// backend/server.js — simple in-memory query cache

const searchCache = new Map();
const CACHE_TTL_MS = 5 * 60 * 1000; // Cache results for 5 minutes

app.post('/api/search', async (req, res) => {
  const { query } = req.body;
  const cacheKey = query.trim().toLowerCase();

  // Return cached result if available and not expired
  if (searchCache.has(cacheKey)) {
    const cached = searchCache.get(cacheKey);
    if (Date.now() - cached.timestamp < CACHE_TTL_MS) {
      return res.json(cached.data);
    }
  }

  // ... run OpenAI search ...

  // Save result to cache
  searchCache.set(cacheKey, {
    data: { query: query.trim(), results: topResults, total: topResults.length },
    timestamp: Date.now(),
  });

  return res.json({ query: query.trim(), results: topResults, total: topResults.length });
});
Tune the similarity threshold. The MINIMUM_SCORE of 0.3 in the search endpoint works well for general content. If your results are too broad, raise it to 0.4. If too few results are returned, lower it to 0.25. The right value depends on how diverse your dataset is.
16. Conclusion
You have just built a fully working AI-powered semantic search feature using React, Node.js, and the OpenAI Embeddings API. Unlike traditional keyword search that breaks when users phrase things differently, this search understands meaning — finding the right content even when the exact words do not match.
Here is a quick summary of what you built in this tutorial:
- A Node.js/Express backend that generates and stores OpenAI embeddings for your content
- A POST
/api/searchendpoint that converts a user query to a vector and ranks results by cosine similarity - A reusable
useAISearchReact hook with debouncing, loading state, and error handling - A clean, dark-themed search UI with skeleton loaders, relevance score badges, and smooth hover effects
- Production best practices including rate limiting, API key security, and query caching
This same architecture can be extended to search through products in an e-commerce store, support tickets in a helpdesk system, documentation pages, or any other content in your application. The OpenAI text-embedding-3-small model makes this extremely affordable — even tens of thousands of documents can be embedded for just a few dollars.
If you found this tutorial helpful, check out our related articles on What is Prompt Engineering, ChatGPT API Integration in PHP, and Top 10 AI Tools Every Web Developer Should Use in 2026 for more practical AI development tutorials.