What is the ChatGPT API?
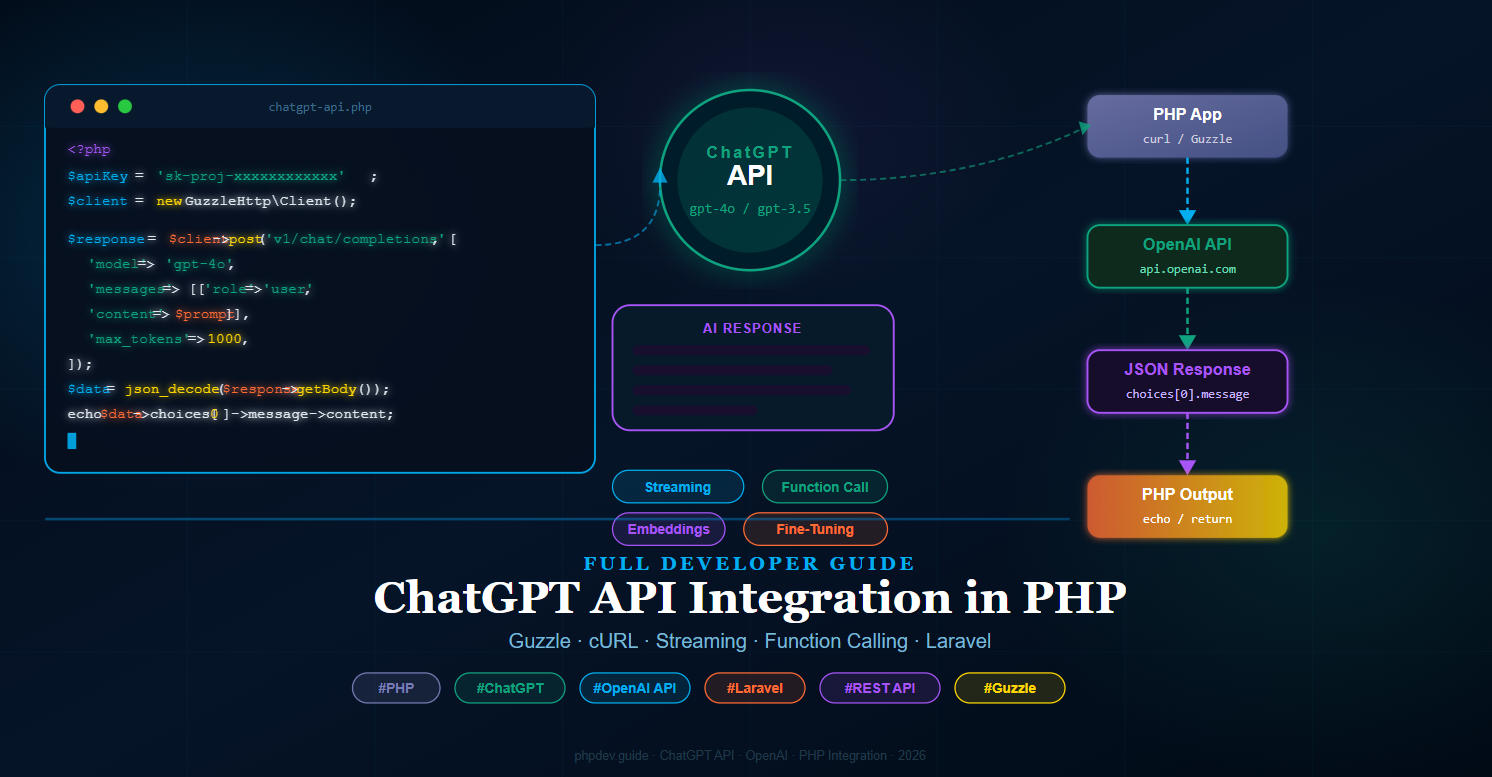
The ChatGPT API (provided by OpenAI) allows developers to send messages to a GPT model and receive AI-generated responses programmatically. Unlike the ChatGPT web interface, the API gives you full control over the model, system prompt, temperature, token limits, and response format — making ChatGPT API integration in PHP a powerful foundation for any AI-powered application.
The API uses a standard REST interface over HTTPS. You send a JSON payload with your messages and model settings, and receive a JSON response containing the AI's reply.
Prerequisites
- PHP 8.1 or higher
- Composer installed globally
- An OpenAI account with a valid API key — get one at
platform.openai.com - Basic knowledge of PHP and REST APIs
- (Optional) Laravel 10/11 for the framework integration section
Step 1: Get Your OpenAI API Key
Log in to your OpenAI account, navigate to API Keys under your profile, and create a new secret key. Copy it immediately — it will not be shown again.
Store the key safely. Never hardcode it directly in your source files. Instead, use an environment variable:
File: .env — project root
OPENAI_API_KEY=sk-proj-xxxxxxxxxxxxxxxxxxxxxxxxxxxxxxxxxxxxxxxx
OPENAI_MODEL=gpt-4o
OPENAI_MAX_TOKENS=1000
Step 2: Set Up the Project and Install Guzzle
Create a new project folder and install the Guzzle HTTP client, which is the most reliable way to make HTTP requests in PHP.
Run in Terminal — project root
mkdir chatgpt-php && cd chatgpt-php
composer init --no-interaction
composer require guzzlehttp/guzzle vlucas/phpdotenv
Your folder structure will look like this after setup:
chatgpt-php/
├── vendor/
├── .env
├── composer.json
└── index.php         ← We will create this next
Step 3: Basic ChatGPT API Call with Guzzle
Now let's make your first ChatGPT API call in PHP using Guzzle. This example sends a user message and prints the AI reply.
Create file: index.php — project root
<?php

require 'vendor/autoload.php';

use GuzzleHttp\Client;
use Dotenv\Dotenv;

// Load environment variables
$dotenv = Dotenv::createImmutable(__DIR__);
$dotenv->load();

$apiKey   = $_ENV['OPENAI_API_KEY'];
$model    = $_ENV['OPENAI_MODEL']      ?? 'gpt-4o';
$maxTokens = (int) ($_ENV['OPENAI_MAX_TOKENS'] ?? 1000);

$client = new Client([
    'base_uri' => 'https://api.openai.com/',
    'timeout'  => 30,
]);

$prompt = 'Explain what an API is in simple terms.';

$response = $client->post('v1/chat/completions', [
    'headers' => [
        'Authorization' => 'Bearer ' . $apiKey,
        'Content-Type'  => 'application/json',
    ],
    'json' => [
        'model'      => $model,
        'max_tokens' => $maxTokens,
        'messages'   => [
            [
                'role'    => 'system',
                'content' => 'You are a helpful assistant.',
            ],
            [
                'role'    => 'user',
                'content' => $prompt,
            ],
        ],
    ],
]);

$data    = json_decode($response->getBody(), true);
$reply   = $data['choices'][0]['message']['content'] ?? 'No response';

echo $reply . PHP_EOL;
Run in Terminal
php index.php
You should see the AI's explanation printed directly in your terminal. This confirms your ChatGPT API integration in PHP is working correctly.
Step 4: ChatGPT API Call with cURL (No Composer)
If you cannot use Composer, PHP's built-in curl extension works equally well. This is useful for shared hosting environments or quick scripts.
Create file: chatgpt-curl.php — project root
<?php

$apiKey = getenv('OPENAI_API_KEY') ?: 'sk-proj-your-key-here';
$prompt = 'What is machine learning in one paragraph?';

$payload = json_encode([
    'model'      => 'gpt-4o',
    'max_tokens' => 500,
    'messages'   => [
        ['role' => 'system', 'content' => 'You are a helpful assistant.'],
        ['role' => 'user',   'content' => $prompt],
    ],
]);

$ch = curl_init('https://api.openai.com/v1/chat/completions');

curl_setopt_array($ch, [
    CURLOPT_RETURNTRANSFER => true,
    CURLOPT_POST           => true,
    CURLOPT_POSTFIELDS     => $payload,
    CURLOPT_HTTPHEADER     => [
        'Authorization: Bearer ' . $apiKey,
        'Content-Type: application/json',
    ],
    CURLOPT_TIMEOUT        => 30,
]);

$response = curl_exec($ch);
$httpCode = curl_getinfo($ch, CURLINFO_HTTP_CODE);
curl_close($ch);

if ($httpCode !== 200) {
    echo "Error {$httpCode}: " . $response;
    exit(1);
}

$data  = json_decode($response, true);
$reply = $data['choices'][0]['message']['content'] ?? 'No response';

echo $reply . PHP_EOL;
Step 5: Build a Reusable OpenAI Service Class
For any real application, wrap the API logic in a dedicated service class so it can be reused across your project cleanly.
Create file: src/OpenAiService.php
<?php

namespace App\Services;

use GuzzleHttp\Client;
use GuzzleHttp\Exception\RequestException;

class OpenAiService
{
    protected Client $client;
    protected string $model;
    protected int    $maxTokens;

    public function __construct(
        protected string $apiKey,
        string $model     = 'gpt-4o',
        int    $maxTokens = 1000
    ) {
        $this->model     = $model;
        $this->maxTokens = $maxTokens;
        $this->client    = new Client([
            'base_uri' => 'https://api.openai.com/',
            'timeout'  => 30,
            'headers'  => [
                'Authorization' => 'Bearer ' . $this->apiKey,
                'Content-Type'  => 'application/json',
            ],
        ]);
    }

    /**
     * Send a single user message and get a reply.
     */
    public function chat(string $userMessage, string $systemPrompt = 'You are a helpful assistant.'): string
    {
        try {
            $response = $this->client->post('v1/chat/completions', [
                'json' => [
                    'model'      => $this->model,
                    'max_tokens' => $this->maxTokens,
                    'messages'   => [
                        ['role' => 'system', 'content' => $systemPrompt],
                        ['role' => 'user',   'content' => $userMessage],
                    ],
                ],
            ]);

            $data = json_decode($response->getBody(), true);
            return $data['choices'][0]['message']['content'] ?? '';

        } catch (RequestException $e) {
            throw new \RuntimeException(
                'OpenAI API Error: ' . $e->getMessage(),
                $e->getCode()
            );
        }
    }

    /**
     * Send a full conversation history (multi-turn chat).
     */
    public function conversation(array $messages): string
    {
        $response = $this->client->post('v1/chat/completions', [
            'json' => [
                'model'      => $this->model,
                'max_tokens' => $this->maxTokens,
                'messages'   => $messages,
            ],
        ]);

        $data = json_decode($response->getBody(), true);
        return $data['choices'][0]['message']['content'] ?? '';
    }
}
Create file: src/autoload.php — or update composer.json autoload section
{
    "autoload": {
        "psr-4": {
            "App\\": "src/"
        }
    }
}
Run in Terminal after updating composer.json
composer dump-autoload
Step 6: Multi-Turn Conversation (Chat History)
A real chatbot needs to remember previous messages. Pass the full conversation history in the messages array on each API call.
Create file: chat-session.php — project root
<?php

require 'vendor/autoload.php';

use App\Services\OpenAiService;
use Dotenv\Dotenv;

$dotenv = Dotenv::createImmutable(__DIR__);
$dotenv->load();

$ai = new OpenAiService($_ENV['OPENAI_API_KEY']);

// Maintain conversation history in memory (use sessions/DB for persistence)
$history = [
    ['role' => 'system', 'content' => 'You are a friendly PHP tutor.'],
];

$userInputs = [
    'What is a PHP array?',
    'Can you show me a PHP array example?',
    'What is the difference between indexed and associative arrays?',
];

foreach ($userInputs as $input) {
    echo "You: " . $input . PHP_EOL;

    // Add user message to history
    $history[] = ['role' => 'user', 'content' => $input];

    // Get AI response
    $reply = $ai->conversation($history);
    echo "AI:  " . $reply . PHP_EOL . PHP_EOL;

    // Add AI reply to history for context
    $history[] = ['role' => 'assistant', 'content' => $reply];
}
Step 7: Streaming Responses
Streaming lets you display the AI's response word by word as it is generated — exactly like the ChatGPT web interface. This dramatically improves perceived performance for longer responses.
Create file: stream.php — project root
<?php

require 'vendor/autoload.php';

use GuzzleHttp\Client;
use Dotenv\Dotenv;

$dotenv = Dotenv::createImmutable(__DIR__);
$dotenv->load();

$apiKey = $_ENV['OPENAI_API_KEY'];
$prompt = 'Write a short story about a PHP developer who discovers AI.';

$client = new Client([
    'base_uri' => 'https://api.openai.com/',
    'timeout'  => 60,
]);

$response = $client->post('v1/chat/completions', [
    'headers' => [
        'Authorization' => 'Bearer ' . $apiKey,
        'Content-Type'  => 'application/json',
        'Accept'        => 'text/event-stream',
    ],
    'json' => [
        'model'    => 'gpt-4o',
        'stream'   => true,          // <-- Enable streaming
        'messages' => [
            ['role' => 'user', 'content' => $prompt],
        ],
    ],
    'stream' => true,
]);

$body = $response->getBody();

// Read the stream line by line
while (!$body->eof()) {
    $line = trim($body->read(1024));

    if (str_starts_with($line, 'data: ')) {
        $json = substr($line, 6);

        if ($json === '[DONE]') {
            echo PHP_EOL;
            break;
        }

        $chunk   = json_decode($json, true);
        $content = $chunk['choices'][0]['delta']['content'] ?? '';

        echo $content;
        flush(); // Send output to browser immediately
    }
}
To stream to a browser, wrap this in a route that sets the proper headers:
<?php

header('Content-Type: text/event-stream');
header('Cache-Control: no-cache');
header('X-Accel-Buffering: no');

// ... streaming code above ...
Step 8: Function Calling (Tool Use)
Function calling lets the AI trigger specific PHP functions based on user intent — for example, fetching weather data, querying a database, or calling an external API. This is one of the most powerful features of the ChatGPT API integration in PHP.
Create file: function-calling.php — project root
<?php

require 'vendor/autoload.php';

use GuzzleHttp\Client;
use Dotenv\Dotenv;

$dotenv = Dotenv::createImmutable(__DIR__);
$dotenv->load();

$apiKey = $_ENV['OPENAI_API_KEY'];
$client = new Client(['base_uri' => 'https://api.openai.com/', 'timeout' => 30]);

// Define the tool / function the AI can call
$tools = [
    [
        'type'     => 'function',
        'function' => [
            'name'        => 'get_current_weather',
            'description' => 'Get the current weather for a given city.',
            'parameters'  => [
                'type'       => 'object',
                'properties' => [
                    'city' => [
                        'type'        => 'string',
                        'description' => 'The city name, e.g. London',
                    ],
                    'unit' => [
                        'type' => 'string',
                        'enum' => ['celsius', 'fahrenheit'],
                    ],
                ],
                'required' => ['city'],
            ],
        ],
    ],
];

// First API call — AI decides whether to call the function
$response = $client->post('v1/chat/completions', [
    'headers' => [
        'Authorization' => 'Bearer ' . $apiKey,
        'Content-Type'  => 'application/json',
    ],
    'json' => [
        'model'    => 'gpt-4o',
        'tools'    => $tools,
        'messages' => [
            ['role' => 'user', 'content' => 'What is the weather in Paris right now?'],
        ],
    ],
]);

$data    = json_decode($response->getBody(), true);
$message = $data['choices'][0]['message'];

// Check if AI wants to call a function
if (isset($message['tool_calls'])) {
    $toolCall  = $message['tool_calls'][0];
    $funcName  = $toolCall['function']['name'];
    $arguments = json_decode($toolCall['function']['arguments'], true);

    // Execute the actual PHP function
    $weatherResult = getWeather($arguments['city'], $arguments['unit'] ?? 'celsius');

    // Second API call — send the function result back to the AI
    $finalResponse = $client->post('v1/chat/completions', [
        'headers' => [
            'Authorization' => 'Bearer ' . $apiKey,
            'Content-Type'  => 'application/json',
        ],
        'json' => [
            'model'    => 'gpt-4o',
            'messages' => [
                ['role' => 'user',      'content' => 'What is the weather in Paris right now?'],
                $message,  // AI's function-call message
                [
                    'role'         => 'tool',
                    'tool_call_id' => $toolCall['id'],
                    'content'      => json_encode($weatherResult),
                ],
            ],
        ],
    ]);

    $final = json_decode($finalResponse->getBody(), true);
    echo $final['choices'][0]['message']['content'];
}

// Mock weather function — replace with real weather API call
function getWeather(string $city, string $unit = 'celsius'): array
{
    return [
        'city'        => $city,
        'temperature' => 18,
        'unit'        => $unit,
        'condition'   => 'Partly cloudy',
    ];
}
Step 9: Laravel ChatGPT API Integration
If you are using Laravel, integrate the ChatGPT API in PHP cleanly by creating a dedicated service and binding it to the service container.
Create file: app/Services/OpenAiService.php
<?php

namespace App\Services;

use Illuminate\Support\Facades\Http;

class OpenAiService
{
    protected string $apiKey;
    protected string $model;

    public function __construct()
    {
        $this->apiKey = config('services.openai.key');
        $this->model  = config('services.openai.model', 'gpt-4o');
    }

    public function chat(string $prompt, string $system = 'You are a helpful assistant.'): string
    {
        $response = Http::withToken($this->apiKey)
            ->post('https://api.openai.com/v1/chat/completions', [
                'model'      => $this->model,
                'max_tokens' => 1000,
                'messages'   => [
                    ['role' => 'system', 'content' => $system],
                    ['role' => 'user',   'content' => $prompt],
                ],
            ]);

        if ($response->failed()) {
            throw new \RuntimeException('OpenAI API failed: ' . $response->body());
        }

        return $response->json('choices.0.message.content') ?? '';
    }
}
Add the OpenAI key to Laravel's config:
Edit file: config/services.php — add this block
'openai' => [
    'key'   => env('OPENAI_API_KEY'),
    'model' => env('OPENAI_MODEL', 'gpt-4o'),
],
? Create file: app/Http/Controllers/ChatController.php
<?php

namespace App\Http\Controllers;

use Illuminate\Http\Request;
use App\Services\OpenAiService;

class ChatController extends Controller
{
    public function __construct(protected OpenAiService $ai) {}

    public function ask(Request $request)
    {
        $request->validate([
            'prompt' => 'required|string|max:2000',
        ]);

        $reply = $this->ai->chat($request->prompt);

        return response()->json(['reply' => $reply]);
    }
}
Edit file: routes/api.php — add this route
use App\Http\Controllers\ChatController;

Route::post('/chat', [ChatController::class, 'ask']);
Now you can POST to /api/chat with a JSON body of {"prompt": "Hello!"} and receive an AI reply.
Step 10: Simple Chat UI with Blade and JavaScript
Let's add a browser-based chat interface for the Laravel integration.
Create file: resources/views/chat.blade.php
@extends('layouts.app')

@section('title', 'ChatGPT PHP Chat')

@section('content')
<div class="max-w-2xl mx-auto py-8">

    <h2 class="text-3xl font-bold text-cyan-400 mb-6">? ChatGPT PHP Chat</h2>

    <div id="chatBox"
         class="bg-gray-900 border border-gray-700 rounded-xl p-4 h-96 overflow-y-auto mb-4 space-y-3">
        <p class="text-gray-500 text-sm text-center">Start a conversation below...</p>
    </div>

    <div class="flex gap-3">
        <input id="promptInput"
               type="text"
               placeholder="Ask something..."
               class="flex-1 bg-gray-800 border border-gray-600 text-white rounded-lg px-4 py-3
                      focus:outline-none focus:border-cyan-500">
        <button id="sendBtn"
                class="bg-cyan-500 hover:bg-cyan-600 text-white font-bold px-6 py-3 rounded-lg transition">
            Send
        </button>
    </div>

</div>
@endsection
Same file — add before closing @endsection
@push('scripts')
<script>
const chatBox   = document.getElementById('chatBox');
const input     = document.getElementById('promptInput');
const sendBtn   = document.getElementById('sendBtn');

function addMessage(role, text) {
    const div = document.createElement('div');
    div.className = role === 'user'
        ? 'text-right'
        : 'text-left';
    div.innerHTML = `
        <span class="inline-block px-4 py-2 rounded-xl text-sm max-w-xs lg:max-w-md
            ${role === 'user'
                ? 'bg-cyan-600 text-white'
                : 'bg-gray-700 text-gray-100'}">
            ${text}
        </span>`;
    chatBox.appendChild(div);
    chatBox.scrollTop = chatBox.scrollHeight;
}

sendBtn.addEventListener('click', async function () {
    const prompt = input.value.trim();
    if (!prompt) return;

    addMessage('user', prompt);
    input.value      = '';
    sendBtn.disabled = true;
    sendBtn.textContent = '...';

    try {
        const res  = await fetch('/api/chat', {
            method : 'POST',
            headers: {
                'Content-Type': 'application/json',
                'X-CSRF-TOKEN': document.querySelector('meta[name="csrf-token"]')?.content,
            },
            body: JSON.stringify({ prompt }),
        });

        const data = await res.json();
        addMessage('ai', data.reply);
    } catch (err) {
        addMessage('ai', 'Error: ' + err.message);
    } finally {
        sendBtn.disabled    = false;
        sendBtn.textContent = 'Send';
    }
});

input.addEventListener('keydown', e => {
    if (e.key === 'Enter') sendBtn.click();
});
</script>
@endpush
Edit file: routes/web.php — add chat view route
Route::get('/chat', fn () => view('chat'))->name('chat');
Error Handling and Rate Limits
The OpenAI API returns specific HTTP status codes you should handle gracefully in your PHP application:
- 401 Unauthorized — Invalid or missing API key. Check your
OPENAI_API_KEYvalue. - 429 Too Many Requests — Rate limit or quota exceeded. Implement exponential backoff and retry logic.
- 500 / 503 — OpenAI server error. Retry after a short delay.
Create file: src/OpenAiException.php
<?php

namespace App\Exceptions;

class OpenAiException extends \RuntimeException
{
    public function __construct(
        string $message,
        public readonly int $httpCode = 0,
        public readonly ?array $apiError = null,
    ) {
        parent::__construct($message, $httpCode);
    }
}
Use it in your service class to catch and rethrow with context:
} catch (RequestException $e) {
    $httpCode = $e->getResponse()?->getStatusCode() ?? 0;
    $body     = json_decode($e->getResponse()?->getBody(), true);

    throw new \App\Exceptions\OpenAiException(
        message : $body['error']['message'] ?? $e->getMessage(),
        httpCode: $httpCode,
        apiError: $body['error'] ?? null,
    );
}
Summary: Files Created in This Guide
.env— API key and model configurationindex.php— Basic ChatGPT API call with Guzzlechatgpt-curl.php— cURL-based API call (no Composer)src/OpenAiService.php— Reusable service classchat-session.php— Multi-turn conversation with historystream.php— Server-sent streaming responsefunction-calling.php— Function / tool calling integrationapp/Services/OpenAiService.php— Laravel service classconfig/services.php— Laravel OpenAI config entryapp/Http/Controllers/ChatController.php— Laravel API controllerresources/views/chat.blade.php— Blade chat UIroutes/api.php— API route for chat endpointroutes/web.php— Web route for chat viewsrc/OpenAiException.php— Custom exception class
Conclusion
You have now built a complete ChatGPT API integration in PHP — from a simple single-file script to a full Laravel-powered chat application with streaming, function calling, multi-turn conversations, and error handling. The OpenAI API is consistent and well-documented, and PHP's Guzzle library makes the HTTP layer clean and straightforward.
With this foundation in place, you can extend the integration further: persist conversation history in a database, add user authentication, rate-limit by user, implement token counting to manage costs, or connect function calling to your own database or external APIs. ChatGPT API integration in PHP opens the door to an entire class of AI-powered features your users will genuinely value.